 UV Studio
Powered by
UV Studio
Powered by
The fastest way to get artwork onto LED walls, floors, pillars, and ribbon boards — with lossless round-trips to Cinema 4D and Blender.
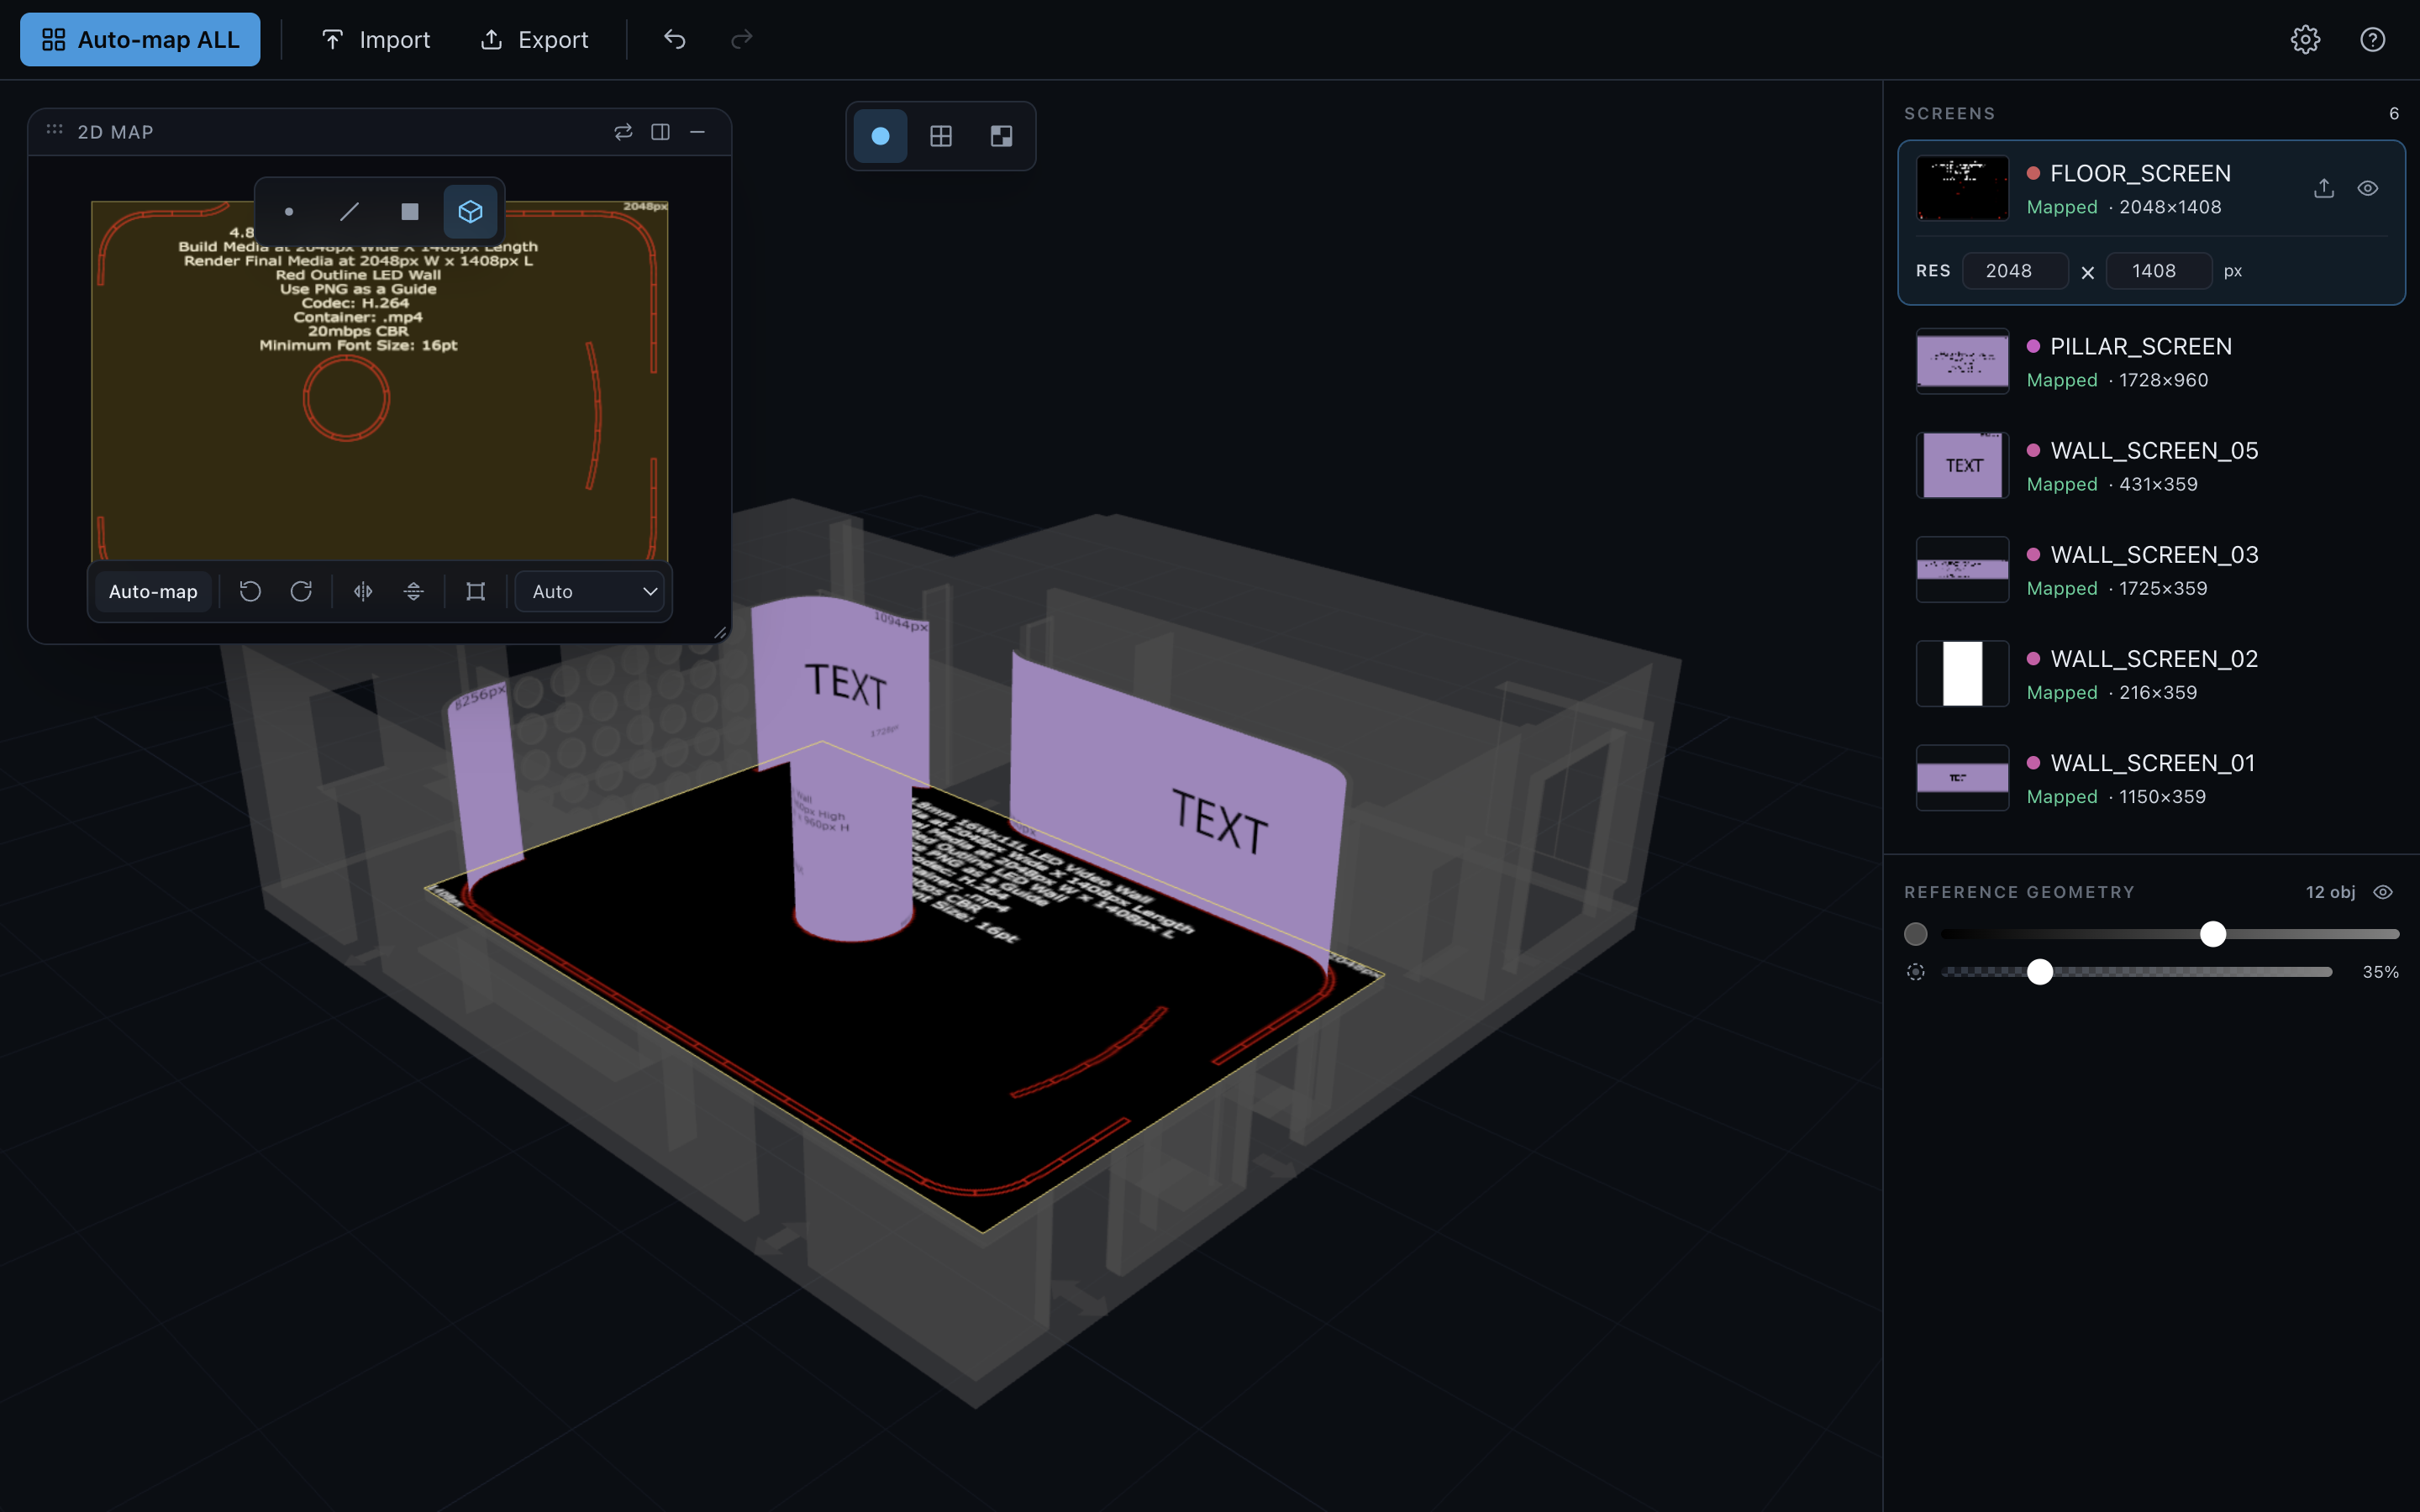
No UV editing, no manual unwrapping. Bring geometry in, link artwork, map, send it back.
Drop a GLB — or Send a selection straight from Cinema 4D / Blender. Screens are auto-detected by name.
Attach PSDs / images. A thumbnail picker matches each layer to its screen by name.
One click fits every screen to its content. Tweak rotation, flip, or projection per screen if needed.
UVs land back on your original objects, losslessly — or export a textured GLB.
Click a feature to see it in action.
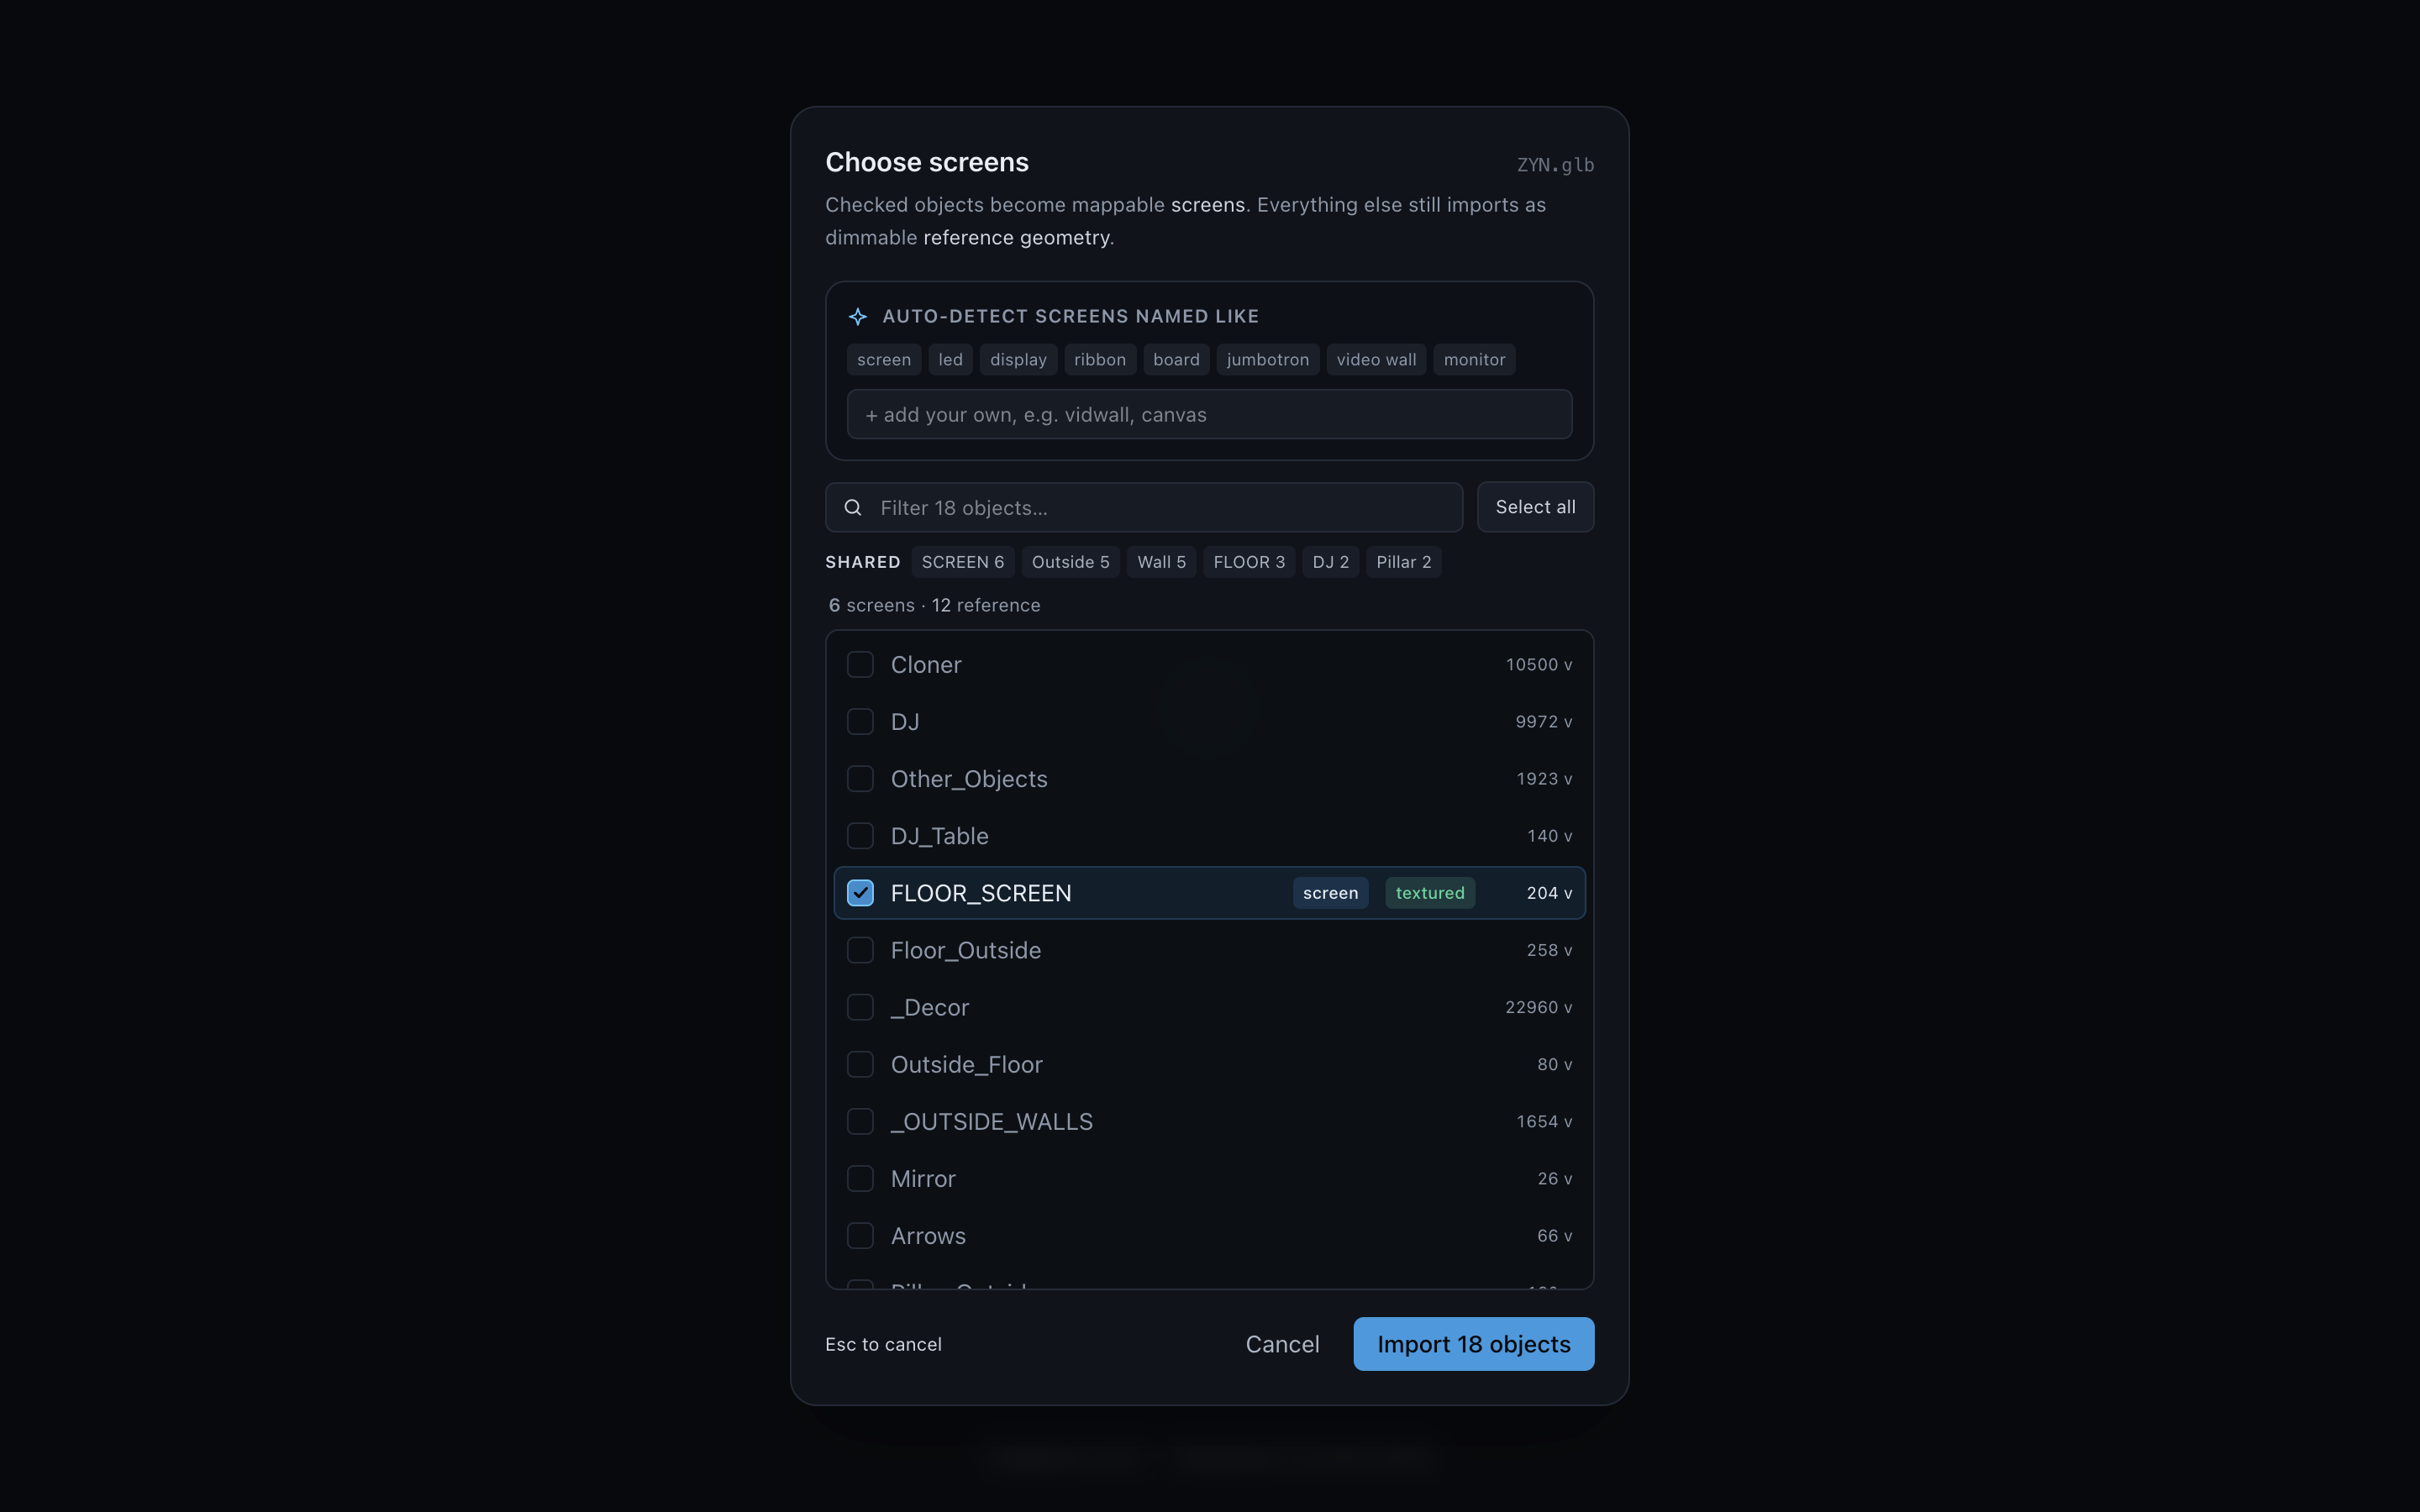
Objects are auto-detected as screens by name — add your own keywords, or filter a busy scene.
Zero-config bridges — install once, then Send and Send back from either app.
Extensions ▸ UV Studio Bridge ▸ Send. Map here, then Send back — UVs land on the original UVW tags.
Geometry & materials never touchedSidebar ▸ UV Studio ▸ Send. Map, then Send back — UVs land on each object's active UV layer.
Only UV coordinates travel backThree sibling tools by hamLT, powered by Toy Robot Media — one for each stage of getting content onto real-world screens.
 Plan
Plan
Previz the whole show in 3D — venues, screens, timelines, comps, and client review links.
Map
Map artwork onto every screen in the venue, with lossless C4D and Blender round-trips.
RenderRender the comps locally — video mapped onto 3D scenes via headless Blender or Cinema 4D.
Free. Signed and notarized on macOS.